Glass jars aren’t just for storing jam – they’re a treasure trove of fun, educational, and eco-friendly projects for kids and parents to do together! Most of us have a few empty jars lying around (think pickle jars, mason jars, or sauce jars). Instead of tossing them in the recycling bin, why not upcycle those jars into exciting crafts, experiments, or gifts? It’s a fantastic way to teach kids about reusing materials – after all, billions of glass jars end up in landfills each year, where each can take up to 4,000 years to decompose. Turning jars into DIY projects gives them a new life and helps the planet.
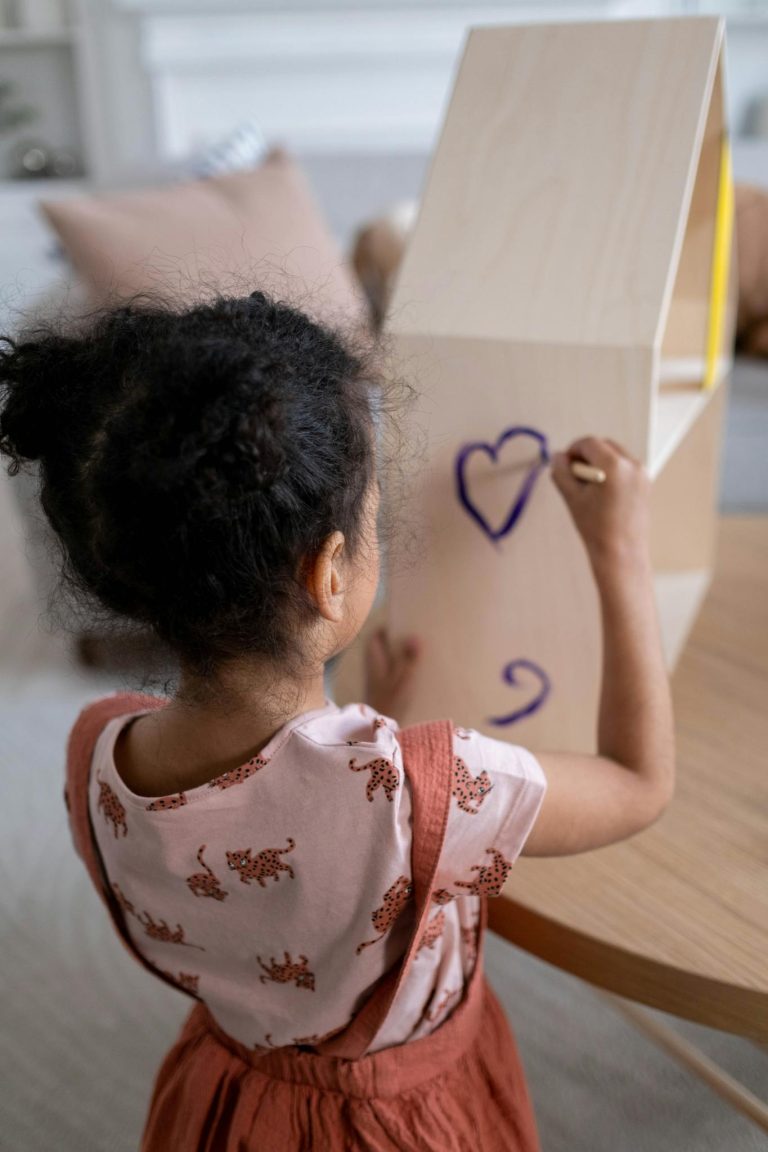
Are you ready to turn those jars into treasures? Try our jar‑based nature collage (press flowers, leaves and tiny mementos inside a jar) as a simple first project.
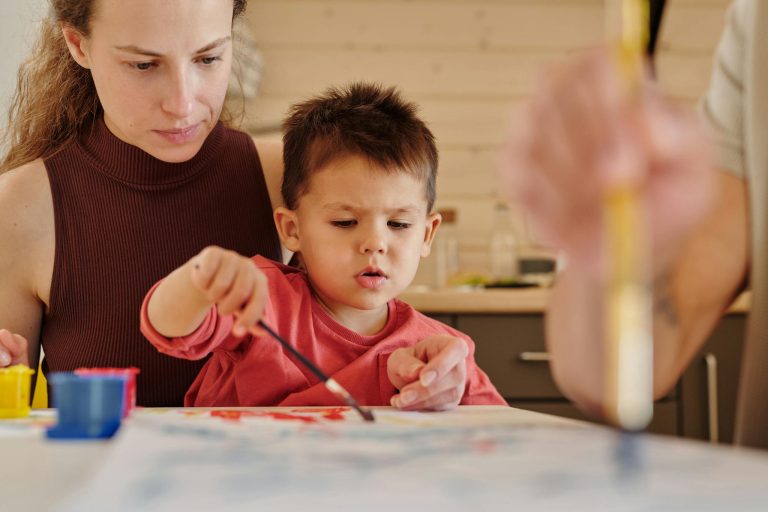
Working on jar projects as a family also offers a great hands-on learning experience. Kids strengthen their creativity, fine motor skills, and understanding of science or nature depending on the project. Research shows that hands-on projects can dramatically improve kids’ learning and retention – children remember around 75% of what they learn by doing (versus much less from just watching). Plus, making something together boosts confidence and family bonds. Whether you have toddlers or pre-teens, you can adapt these ideas to your child’s level and let them take the lead where possible.
Key Points:
Glass jars can be upcycled into creative, educational family projects that teach sustainability, science, fine motor skills, and creativity while reducing waste.
The article offers step-by-step jar activities — terrariums, snow globes, herb gardens, crystal experiments, galaxy jars, memory jars, and nature collages — each designed for hands-on learning and family bonding.
Research shows kids retain ~75% of what they learn through doing, making jar crafts powerful tools for learning biology, ecosystems, chemistry, creativity, and responsibility.
Upcycling jars teaches eco-awareness (glass can take up to 4,000 years to decompose) and shows kids how everyday items can be transformed into treasures.
These projects build confidence, spark curiosity, and create meaningful family memories.
1. Jar Terrarium: How to Build a Mini Indoor Garden With Kids
Bring the outdoors inside by creating a tiny terrarium in a glass jar. A terrarium is like a miniature garden or ecosystem enclosed in a container – think of it as a pet plant world that kids can design and take care of. This project is wonderful for teaching kids about plant life cycles, moisture, and responsibility (they’ll have to water and care for their mini-garden). It also makes a beautiful decoration or gift.
Supplies: A clear glass jar (with a lid if possible for a closed terrarium), small pebbles or gravel, a bit of activated charcoal (from pet stores, optional but helps keep water fresh), potting soil, and small plants like moss, succulents, or tiny ferns. You can also add fun decorations: small animal figurines, pretty rocks, or a little fairy garden accessory.
Steps:
- Prepare the Jar: Make sure your jar is clean and dry. Add a base layer of pebbles (about 1–2 inches) at the bottom for drainage. This prevents plant roots from sitting in water. (Top tip from experts: about 2-3 cm of pebbles is a good drainage layer). If you have activated charcoal, sprinkle a thin layer on top of the pebbles – this helps filter the water and keeps the terrarium fresh (especially important for closed lid terrariums).
- Add Soil: Next, add a layer of potting soil on top of the pebbles/charcoal. You typically want a few inches of soil, or enough for your plants’ roots to sit comfortably. Pat it down gently. If your jar is small, you might use a paper rolled into a funnel to pour soil neatly. Ensure there’s enough soil so plant roots can be well covered.
- Plant Your Greenery: Time to plant! Take your small plants or moss and create a little arrangement. If using succulents or cacti, an open-top jar is better (they prefer dry environment). For moss or ferns, you can close the jar for a humid environment. Using a spoon or your fingers, make a small hole in the soil for each plant. Plant the largest one first, gently placing it and patting soil around the roots. Continue with any other tiny plants. Don’t overcrowd; leave some space for them to grow. If you have sheet moss, you can press it on top of the soil like a green carpet.
- Decorate: Here’s the fun personalization step – add decorative touches. Kids might place a tiny plastic dinosaur or a ceramic ladybug in the jar to create a scene. Pretty stones, pinecones, or shells can make it look like a magical little world. Just ensure anything you add is clean (to avoid mold) and not too large for the jar.
- Water and Close: Lightly water your terrarium. It should be moist but not soaking. If it’s a closed terrarium (with lid), you’ll only need to water sparingly since the water will recycle inside (you might even see it condense on the walls and “rain” down). If it’s open, you’ll water a bit more often. Now close the lid if using one. Place your terrarium where it can get some indirect sunlight (too much direct sun can overheat a closed terrarium).
- Maintain: Teach the kids how to care for their jar garden. Closed terrariums might not need water for weeks – if you see condensation, it’s doing well; if it looks very dry, add a tablespoon of water. Open terrariums should be watered when the soil looks dry (typically once a week or so). Trim plants if they outgrow the jar. It’s like a little science experiment over time to see how the ecosystem thrives. Kids can keep a journal or take pictures to track growth.
This mini-garden will fascinate children as they watch their plants adjust and grow in the new environment. It’s a fantastic conversation starter about ecosystems, the water cycle (in a closed jar you can literally see evaporation and condensation), and plant biology. Building a terrarium with kids encourages creativity and “offers a real-life context for science and environmental teaching”. If you also want a video as a support, check this great YouTube DIY video.
2. DIY Snow Globe Jar: Simple Craft for Kids With Glitter and Science
With a jar, you can create your very own snow globe featuring whatever scene or figurine your child wants inside. It’s like capturing a little world or favorite character in sparkly “snow.” This craft is perfect around the holidays, but honestly fun any time of year (imagine a summer-themed “sand globe” with glitter – why not!). It also makes a heartfelt homemade gift for grandparents or friends – kids can customize what goes inside specially for the recipient.
Supplies: A small jar (short, wide-mouth jars are great, like baby food jars or small mason jars), a plastic figurine or toy that will fit inside (e.g., a small animal, LEGO mini-figure, or a tiny photo laminated/sealed), waterproof glue (like a hot glue gun or epoxy), glycerin (optional, available at pharmacies or craft stores) or clear glue, water, and glitter (white or iridescent looks like snow, but any is fine). Also, some ribbon or fabric to decorate the lid if desired.
Steps:
- Choose and Prep Figure: Pick a figurine or object to feature. Make sure it’s waterproof and fits comfortably in the jar with the lid closed. Plastic toys are ideal. If it’s something like a paper photo, you’ll need to seal it in clear packing tape or laminate it to protect from water. Get the base of the object ready for gluing – it should have a flat area to glue onto the inside of the lid. You can also create a mini scene by gluing multiple small pieces (like a tiny tree and a deer). Be creative!
- Glue to Lid: Remove the jar lid and glue your figurine onto the inside of the lid (which will become the base of the snow globe). Use a strong waterproof glue. Hot glue works if the item isn’t too slick, but it can deteriorate in water over time; a two-part epoxy or superglue might hold longer under water. Adults should probably do the gluing step or assist closely. Center the object or arrange your mini scene, and hold it in place until the glue sets. Let it dry completely per glue instructions (important, or it might come loose in the water later).
- Mix Water and Glycerin: Fill your jar almost to the top with distilled water (or cooled boiled water, to minimize cloudiness over time). Leave a little room (maybe 1/2 inch) at the top for displacement when the figure goes in. Add a few drops of glycerin to the water and stir – about a teaspoon for a small jar, up to a tablespoon for a larger jar. Glycerin is a transparent, syrupy liquid that makes the water “thicker,” causing the glitter to fall more slowly (just like glue did in the calm jar). If you don’t have glycerin, you can use a bit of clear glue or just use water (the glitter will settle faster but still pretty). This step is a mini science lesson in viscosity!
- Add Glitter (Snow): Sprinkle in your glitter – this is the “snow.” Silver, white, or iridescent glitter gives that classic snow look. Add a teaspoon or so, but you can adjust to preference. Too much glitter can obscure the scene, so err on a moderate amount first. You can also put a couple of tiny foil confetti shapes (like stars) for variety. Kids love adding the sparkles – just remind them it doesn’t need to be half the jar full (unless you want a blizzard!).
- Assemble the Globe: Now take your lid (with the glued figure) and carefully insert it into the jar. As you push it in, some water will overflow – that’s why we left a little gap. Tighten the lid firmly. You might see some air bubble – a small bubble is fine and actually helps in shaking, but if you have a big air gap you might want to reopen and add more water. Once closed tight, seal around the lid if desired with hot glue or a ring of epoxy to prevent leaks, especially if this will be played with by small kids.
- Shake and Enjoy: Turn the jar upside down (so the lid is at the bottom) – voila, you have a snow globe! Shake or tilt gently and watch the glitter snow fall around your little scene. If the glitter is clumping or not falling slowly enough, adjust by opening (again, carefully) and adding a tad more glycerin or water as needed. When perfect, you can decorate the outside: glue a strip of ribbon around the lid to make it look pretty, or paint the lid with rust-proof paint if you like.
Now you have a custom snow globe. Kids will likely want to make more once they see how it works – perhaps one for each season or one with their favorite superhero inside. It’s a craft that results in a toy/display they’ll be proud of. And it introduces some science: why does the glitter fall slowly (liquid density), why does glycerin help, and even discussion of snow globes history or the concept of “precipitation.” For visual support, check out this YouTube video on the project.
3. Kitchen Herb Garden Jar
Grow your own herbs right on the windowsill! This project turns jars into small planters for herbs or other easy-to-grow plants. It’s both a craft and a lesson in biology and responsibility. Kids learn how plants grow, and later you can even harvest the herbs for cooking – talk about farm-to-table, or rather jar-to-table. Herbs like basil, mint, or green onion regrow are great choices because they’re resilient and useful. If you don’t have herb seeds, you can use kitchen scraps (like the root end of green onions or romaine lettuce) to regrow plants in jars of water.
Supplies: Glass jars (one per herb you want to grow), potting soil, herb seeds (such as basil, parsley, cilantro) or cuttings/seedlings from a nursery. Alternatively, veggie scraps to regrow (green onions, celery base, etc.). Small rocks (for drainage if using soil), a trowel or spoon, and labels or popsicle sticks to mark the plants. If you want to decorate the jars, grab some acrylic paint or twine.
Steps (for planting in soil):
- Prep Jar Planter: If the jar doesn’t have drainage holes (most don’t), put a thin layer of pebbles at the bottom to help excess water pool away from roots. (Herbs don’t like waterlogged roots.) Fill the jar about 3/4 with potting soil. Make sure the jar is in its final spot or on a tray if it doesn’t drain, to avoid mess if water overflows later.
- Plant Seeds or Seedlings: If using seeds, follow packet instructions – usually make a small hole or indent in soil, put a few seeds in, then cover lightly with soil. For example, basil seeds can be sprinkled and covered with 1/4 inch of soil. If using a seedling (baby herb plant) from a nursery, transplant it by making a hole, setting the plant’s roots in and patting soil around it. You could also do a cutting (like a stem of mint that has roots in water) and plant it similarly. Plant one type of herb per jar for simplicity. Water gently after planting – soil should be moist but not muddy.
- Sunlight & Placement: Place the jar planters on a window sill or balcony where they get good sunlight (4-6 hours a day ideally, many herbs like sun). If only a shady spot is available, choose herbs that tolerate less sun (like mint or parsley). Label each jar with the herb’s name – you can write on the glass with a paint marker or tie a labeled tag. Let the kids personalize their jars: maybe paint the jar exterior (keep it low so they can still see soil level) or decorate the lid if using jars without the lid on.
- Water and Watch: Over the next days and weeks, have the kids water the herbs as needed (when soil feels dry at the top). They can spray with a mister to avoid overwatering. Soon you should see sprouts if you planted seeds – an exciting moment! Encourage them to observe changes and maybe measure growth. This can spark conversations: “What do plants need to grow?” (water, sun, soil) and “What do you notice about how this mint smells?” etc. Kids might enjoy keeping a growth diary or drawing pictures of their plant each week.
- Harvest Time: Once the herbs are grown enough (leaves to pick), show kids how to carefully harvest – pinch or snip a few leaves for use in cooking. For instance, pluck some basil for pasta night, or mint for lemonade. Involve them in using their home-grown herbs: “You grew this rosemary, let’s add it to our roasted potatoes!” This full cycle from planting to eating is incredibly rewarding for children. It teaches them where food comes from and gives a sense of accomplishment.
If you prefer a no-soil method (less mess for little ones), regrowing kitchen scraps in water is an alternative:
- Take the white bulb end of green onions (scallions) that usually gets thrown out, and place it root-down in a jar with just enough water to cover the roots. In a few days, green shoots will start growing again from the top! Keep water fresh by changing it every couple days. Kids can trim off the new green onion growth with scissors to sprinkle on food.
- Similarly, you can put a lettuce stump or celery base in a shallow jar of water; new leaves will start forming in the center. After some growth, transfer to soil for a bigger plant or enjoy the micro-leaves as garnish.
- Sweet potato vine: suspend a sweet potato half in water with toothpicks and watch vines grow – a beautiful ornamental project.
Gardening in jars connects kids to nature, even indoors. Studies have shown that kids involved in gardening tend to develop better environmental attitudes and healthier eating habits. They take pride in tasting something they grew. It also fosters patience and routine (checking their “plant babies” each day).
4. Crystal Science Experiment in a Jar
Time for some science magic – growing crystals in a jar! This project turns your jar into a mini crystal farm, where kids can watch crystal structures form over a few days. It’s like making rock candy (which is sugar crystals) but can also be done with salts like Epsom salt or borax to create interesting spiky crystals. This experiment is fascinating because the results look like glittering gems or snowflakes that you grew yourself. It’s a fantastic way to talk about solutions, evaporation, and geology (how natural crystals/minerals form from cooling magma or evaporating water).
We’ll outline a common method using borax (a cleaning powder) to grow pretty crystal snowflakes, and an alternative with Epsom salt for quick needle-like crystals. Choose whichever you have on hand.
A) Borax Crystal Ornaments
Borax forms chunky, clear crystals that can coat pipe cleaners, making beautiful ornaments (like snowflakes). Borax is generally safe for this experiment with supervision – it’s a laundry booster, not to be ingested, and wash hands after handling the crystals.
Supplies (Borax method): A wide-mouth jar, borax powder (found in laundry aisle), hot water, pipe cleaners, string, a pencil or stick, spoon. Food coloring (optional, to tint crystals).
Steps:
- Create a Shape: Using pipe cleaners, have your child bend a shape that will fit into the jar. A classic one is a snowflake: twist 3 small pieces in the center to make a six-pointed star/snowflake. Or make a heart, a spiral, etc. The shape should be a bit smaller than the jar’s width so it doesn’t touch the sides. Attach a piece of string to the top of the shape.
- Prepare Borax Solution: Heat water to boiling (adult job). For each cup of water, you’ll dissolve about 3 tablespoons of borax (almost making a saturated solution). For a pint jar, ~2 cups water and ~6 tbsp borax is good. Carefully pour hot water into the jar. Add borax and stir until it dissolves. It’s okay if a little remains undissolved; it means the solution is saturated (can’t hold more borax). If you want colored crystals, stir in a drop or two of food coloring. The water should look clear (or tinted) with maybe some borax settling at bottom.
- Suspend the Shape: Tie the free end of the string to a pencil and lay the pencil across the jar opening so the pipe cleaner shape hangs in the solution without touching the sides or bottom. Adjust length as needed. Make sure it’s fully submerged.
- Wait and Watch: Now leave the jar in a safe place where it can sit undisturbed. As the hot solution cools, the borax will come out of solution and start to crystallize on the pipe cleaner (and a bit on jar walls). By the next day, you should see crystals forming! For best results, leave it 24 hours or even 48 hours. The longer it sits, the larger the crystals can grow, until the solution is depleted.
- Reveal Your Crystal Creation: Gently pull out the pipe cleaner shape – it should be coated in hard, sparkly crystals, transforming it into a crystal ornament. Pat it dry on a paper towel. Kids will be amazed at the transformation: the fuzzy pipe cleaner is now like a snowflake encrusted with “ice”. If you used blue food color, it might look like blue ice, etc. Tie a new ribbon or string to hang it in a window or on a holiday tree. The remaining solution in the jar can be flushed (small amount of borax down the drain with lots of water is fine) and any leftover crystals can be disposed of – though some kids like to keep the little bits as “gems”.
Science Tidbit: Explain how hot water holds more borax in solution, and as it cools, the borax “falls out” of the water and clings together in crystal patterns. It’s a bit like how rock candy (sugar crystals) or cave stalactites form over time. The pipe cleaner acted as a “seed” surface for crystals to start growing.
B) Epsom Salt Crystal Garden
Epsom salt (magnesium sulfate) can grow needle-like crystals quickly – sometimes within hours. These crystals are more delicate and not attached to a shape (they’ll form at bottom of jar), but the speed is exciting.
Supplies (Epsom method): A jar or clear cup, Epsom salt, hot water, optionally a few drops of dish soap (it can alter the crystal habit interestingly), and food coloring if desired.
Steps:
- Mix Solution: Heat about 1 cup of water until very warm (doesn’t have to boil). In the jar, mix equal parts warm water and Epsom salt (so, 1/2 cup water + 1/2 cup Epsom salt) and stir for a couple minutes. Not all will dissolve; that’s fine. Optionally add a drop of dish soap (can make crystals form in star-like clusters) and food coloring for colored crystals.
- Cool Quickly: To get fast crystal growth, place the jar in the fridge. In about 3-4 hours, you should see a bunch of thin crystals at the bottom like a bed of needles or spikes. The cooler temperature helps the crystals form faster.
- Examine and Keep: Pour off the remaining solution gently to reveal the crystal cluster. They will be small and fragile (not like big borax ones), but shiny. You can use a spoon to scoop some out for the kids to touch and look at with a magnifying glass. They might look like tiny shards of glass or frost. If left longer, they may grow a bit more, but they can also start dissolving if the environment changes.
This shows another way crystals form – usually slower cooling = bigger crystals, faster = smaller. That’s a good concept if they’re interested: quick cooling of lava in a volcano makes small crystals (basalt), slow cooling makes large ones (granite).
Many high-authority science education sources encourage such experiments as they foster observation and inquiry. For example, a science outreach video on YouTube like Jam Jar Geology: Creating Crystals demonstrates how simple materials can form crystals, emphasizing the hands-on discovery approach.
Safety: Don’t let young kids eat or drink any solutions. Borax and Epsom salt are for experimenting, not consuming. After the experiment, everyone wash hands. But do let the kids handle the finished crystals – feeling the texture, noting the shapes (maybe using a magnifier to see the crystal shapes) will enhance their learning and excitement.
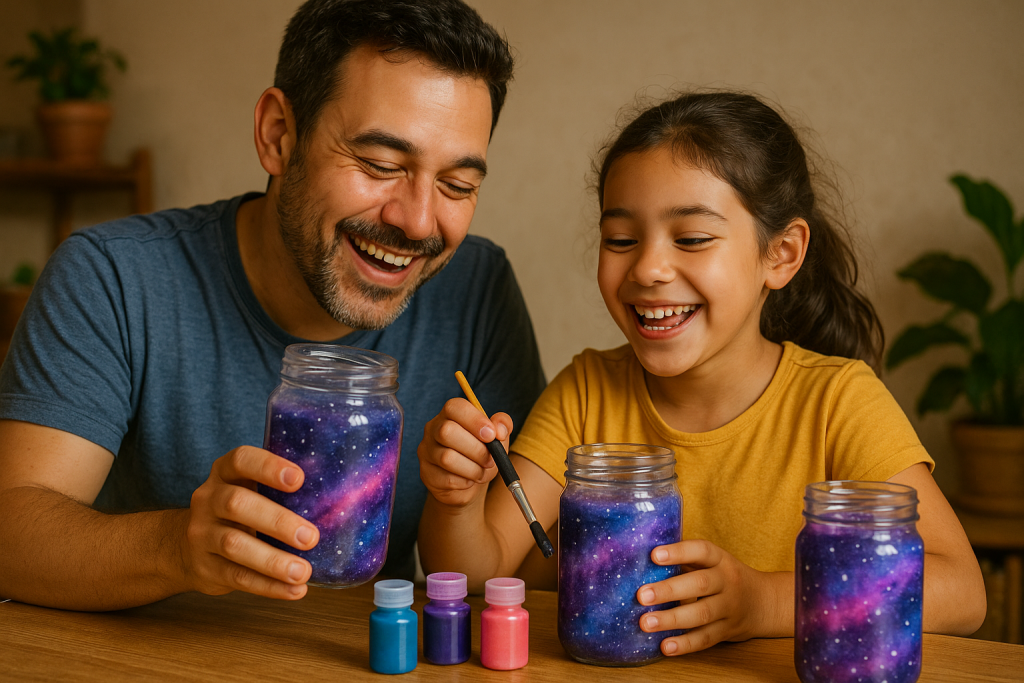
5. Galaxy in a Jar: Colorful Space-Inspired Craft With Cotton and Glitter
Here’s a craft that’s pure imagination and visual delight: making a galaxy jar, sometimes called a nebula in a bottle. The idea is to create a swirly, colorful jar that looks like a piece of outer space – with cosmic colors and star-like glitter suspended inside. Unlike the calm-down glitter jar (where glitter freely moves in liquid), a galaxy jar uses cotton to hold layers of colored liquids in place, so it looks like cloudy wisps of a galaxy. Kids who love space or just love bright colors will be thrilled with this. It’s an easy craft and the result is mesmerizing.
Supplies: A clear jar with lid, cotton balls or fiber fill stuffing, water, paint or food coloring (various colors you want in your “galaxy” – typically blue, purple, pink), glitter (silver, holographic, etc.), and a stick or butter knife to push things around.
Steps:
- Color Some Water: You’ll need to create colored water for 2-3 different colors. In separate cups, mix a bit of water with a squirt of acrylic paint or a few drops of food coloring for each desired color. Space-themed colors like dark blue, teal, purple, magenta work well. Make sure the colors are vibrant (the cotton will lighten them).
- Layering – Round 1: Pull apart a few cotton balls to make them fluffy and stringy, and stuff them into the bottom of the jar to form a layer. Push them down a bit. Now pour one of your colored waters into the jar until the cotton is just saturated – not too much extra liquid above it. Add a pinch of glitter on top of this. The cotton absorbs the color, creating a cloudy layer.
- Layering – Round 2: Add another bunch of pulled cotton on top of the first layer. Now pour a second color of water on this new cotton until saturated. (If colors mix a little at the boundary, that’s okay, it can make a nice gradient, but try not to stir them too much so you still see distinct layers.) Again, sprinkle some glitter – these are your “stars.”
- Layering – Round 3 (and more): Repeat with a third layer of cotton and a third color. You can continue layering as many colors as your jar height allows. Usually 3–4 layers fill a jar. Finish with glitter on the top. The jar should look like bands of different colored clouds with sparkles throughout.
- Seal and Shake (Gently): Close the lid tightly. You don’t actually shake this one vigorously like a snow globe; if you do, the layers will all muddle. Instead, you can tilt it slowly to see some movement of the “nebula.” But mostly it’s for display. The glitter might slowly drift when the jar is moved, giving twinkle among the cotton “cosmic clouds.”
The final effect is a gorgeous galaxy-like jar. Hold it up to light and you’ll see the glitter twinkle and the colors marbling slightly. Each jar is unique – some look like a distant nebula, others like a fun tie-dye. Kids can name their galaxy and even draw a picture of what they imagine inside it (aliens? planets?).
It’s a quick craft (maybe 15 minutes) but has a big “wow” factor. If you want, complement it with a brief stargazing app or book to point out a real nebula or galaxy in the night sky later, linking the craft to the real cosmos.
(For an example of this craft, see DIY Galaxy Jar for Kids – a video that demonstrates layering the cotton and colors to create a pretty galaxy effect.)
You can also extend this activity by making an outdoor nature collage or chalk mural – see our collaborative art projects article for ideas.
6. Memory Jar & Time Capsule: Simple Keepsake Projects for Families
Not all jar projects are about crafting something physical – some are about collecting memories or knowledge. A memory jar is a sweet ongoing family project: you decorate a jar and use it to hold written memories, happy moments, or thankful thoughts throughout the year. Similarly, a time capsule jar can be filled with predictions or messages and tucked away to open in the future. These jar projects are more about the sentimental value and can be a great reflective activity for kids.
Memory Jar idea: At the start of the year (or anytime, really), designate a jar as the family memory jar. Decorate it with a label and stickers (e.g., “Our Family Memories 2025”). Throughout the months, everyone writes down good moments on little slips of paper and drops them in the jar – like “April 12: Sarah learned to ride a bike!” or “Had a fun movie night with popcorn on a rainy day.” Kids can add drawings or movie ticket stubs, etc. Then at New Year’s or year-end, open the jar and read all the memories together, reminiscing. It’s a wonderful tradition that promotes gratitude and family bonding.
Time Capsule Jar idea: Have each family member write a short note about current favorites (foods, friends, hobbies) or a prediction (“In 5 years I will be…”) and maybe include a small photo of each person. Seal the jar and agree to open it in a set number of years (or on a specific future date). Decorate the jar with “Do not open until 2030!” etc. Kids learn about the concept of future and change over time. When you finally open it, it’s a treat to see if predictions came true and how everyone has changed.
These projects might not be flashy in appearance, but using a jar as a repository for thoughts teaches kids the value of reflection. A stat from a family survey indicated that families who share positive experiences and gratitude have improved overall well-being. A memory jar is one way to practice that sharing. It also subtly develops writing skills and emotional intelligence as kids articulate what made them happy.
To decorate such jars, you can use glass paint to write “Memories” or wrap it in decorative paper. Keep it in a prominent spot with pens and paper nearby to encourage adding to it.
Final Thoughts: Why Jar Projects Create Lifelong Learning and Memories
DIY projects like these are as much about the process as the end product. Your child might not remember every fact about crystal formation, but they’ll remember that afternoon when you both sat at the kitchen table, stirring a jar of blue water and checking every hour with excitement. Or the evening when the family turned off the lights and told stories by the gentle glow of a lantern they crafted themselves.
These little moments are the “glue” that holds family life together (pun intended, since we did use a lot of glue!). By engaging in hands-on jar projects, you’re also teaching by example the values of creativity, patience, sustainability (through recycling jars), and scientific curiosity.
Quick FAQ:
Jar projects teach science (ecosystems, chemistry, geology), fine motor skills, creativity, responsibility, and environmental awareness. Hands-on activities significantly improve learning retention and confidence.
Terrariums, snow globes, herb gardens, crystal experiments, galaxy jars, memory jars, and nature collages are kid-friendly projects using simple supplies and household materials.
Upcycling jars shows children how everyday waste can be reused creatively, helping reduce landfill waste and modeling eco-friendly habits through practical activities.